MiniArt Roman Legionary – A quick build tutorial
A nicely packaged kit in pressed styrene. A plastic stand and a shield decal are included.
The kit slots together quite nicely. You’ll need to fill a few gaps in the arms and legs but other than that pretty straightforward. I used perfect plastic putty as it smooths easily with a wet finger and no sanding is needed but any filller will do.
primed in UMP grey and set in base. The little plastic base that comes with the kit is a bit naff, so I like to make my own. I simply press a lump of DAS clay into a plastic pot lid of the size required and then press the figure into place. Once dry I will knock the base out and then attach it to a wooden plinth that I have. Sand can be added and flock or grass tufts and it can also be textured if you want. I have been considering one of those textured rollers made for this purpose but they seem quite expensive for what they are so will just have a go with a cocktail stick and see how that works out.
next I will paint him. I have left off all his armour plates and his dagger and sword as these will be easier to paint on the sprue. He isn’t stuck down on the base yet and his helmet, shield and spear are also still loose.
sprayed some base colours – flesh, blue/black mix and gun metal
glued on the armour plates and did a quick reassemble. I will move onto brushwork next and start to work the highlights and shadows and some of the finer details to the uniform, face and weapons.
just a few small details left to add like eyeballs and some rivets to the armour and the decals to the shield. I will then add a bit of static grass to the base and maybe some pigments before the whole thing will get a matt coat.
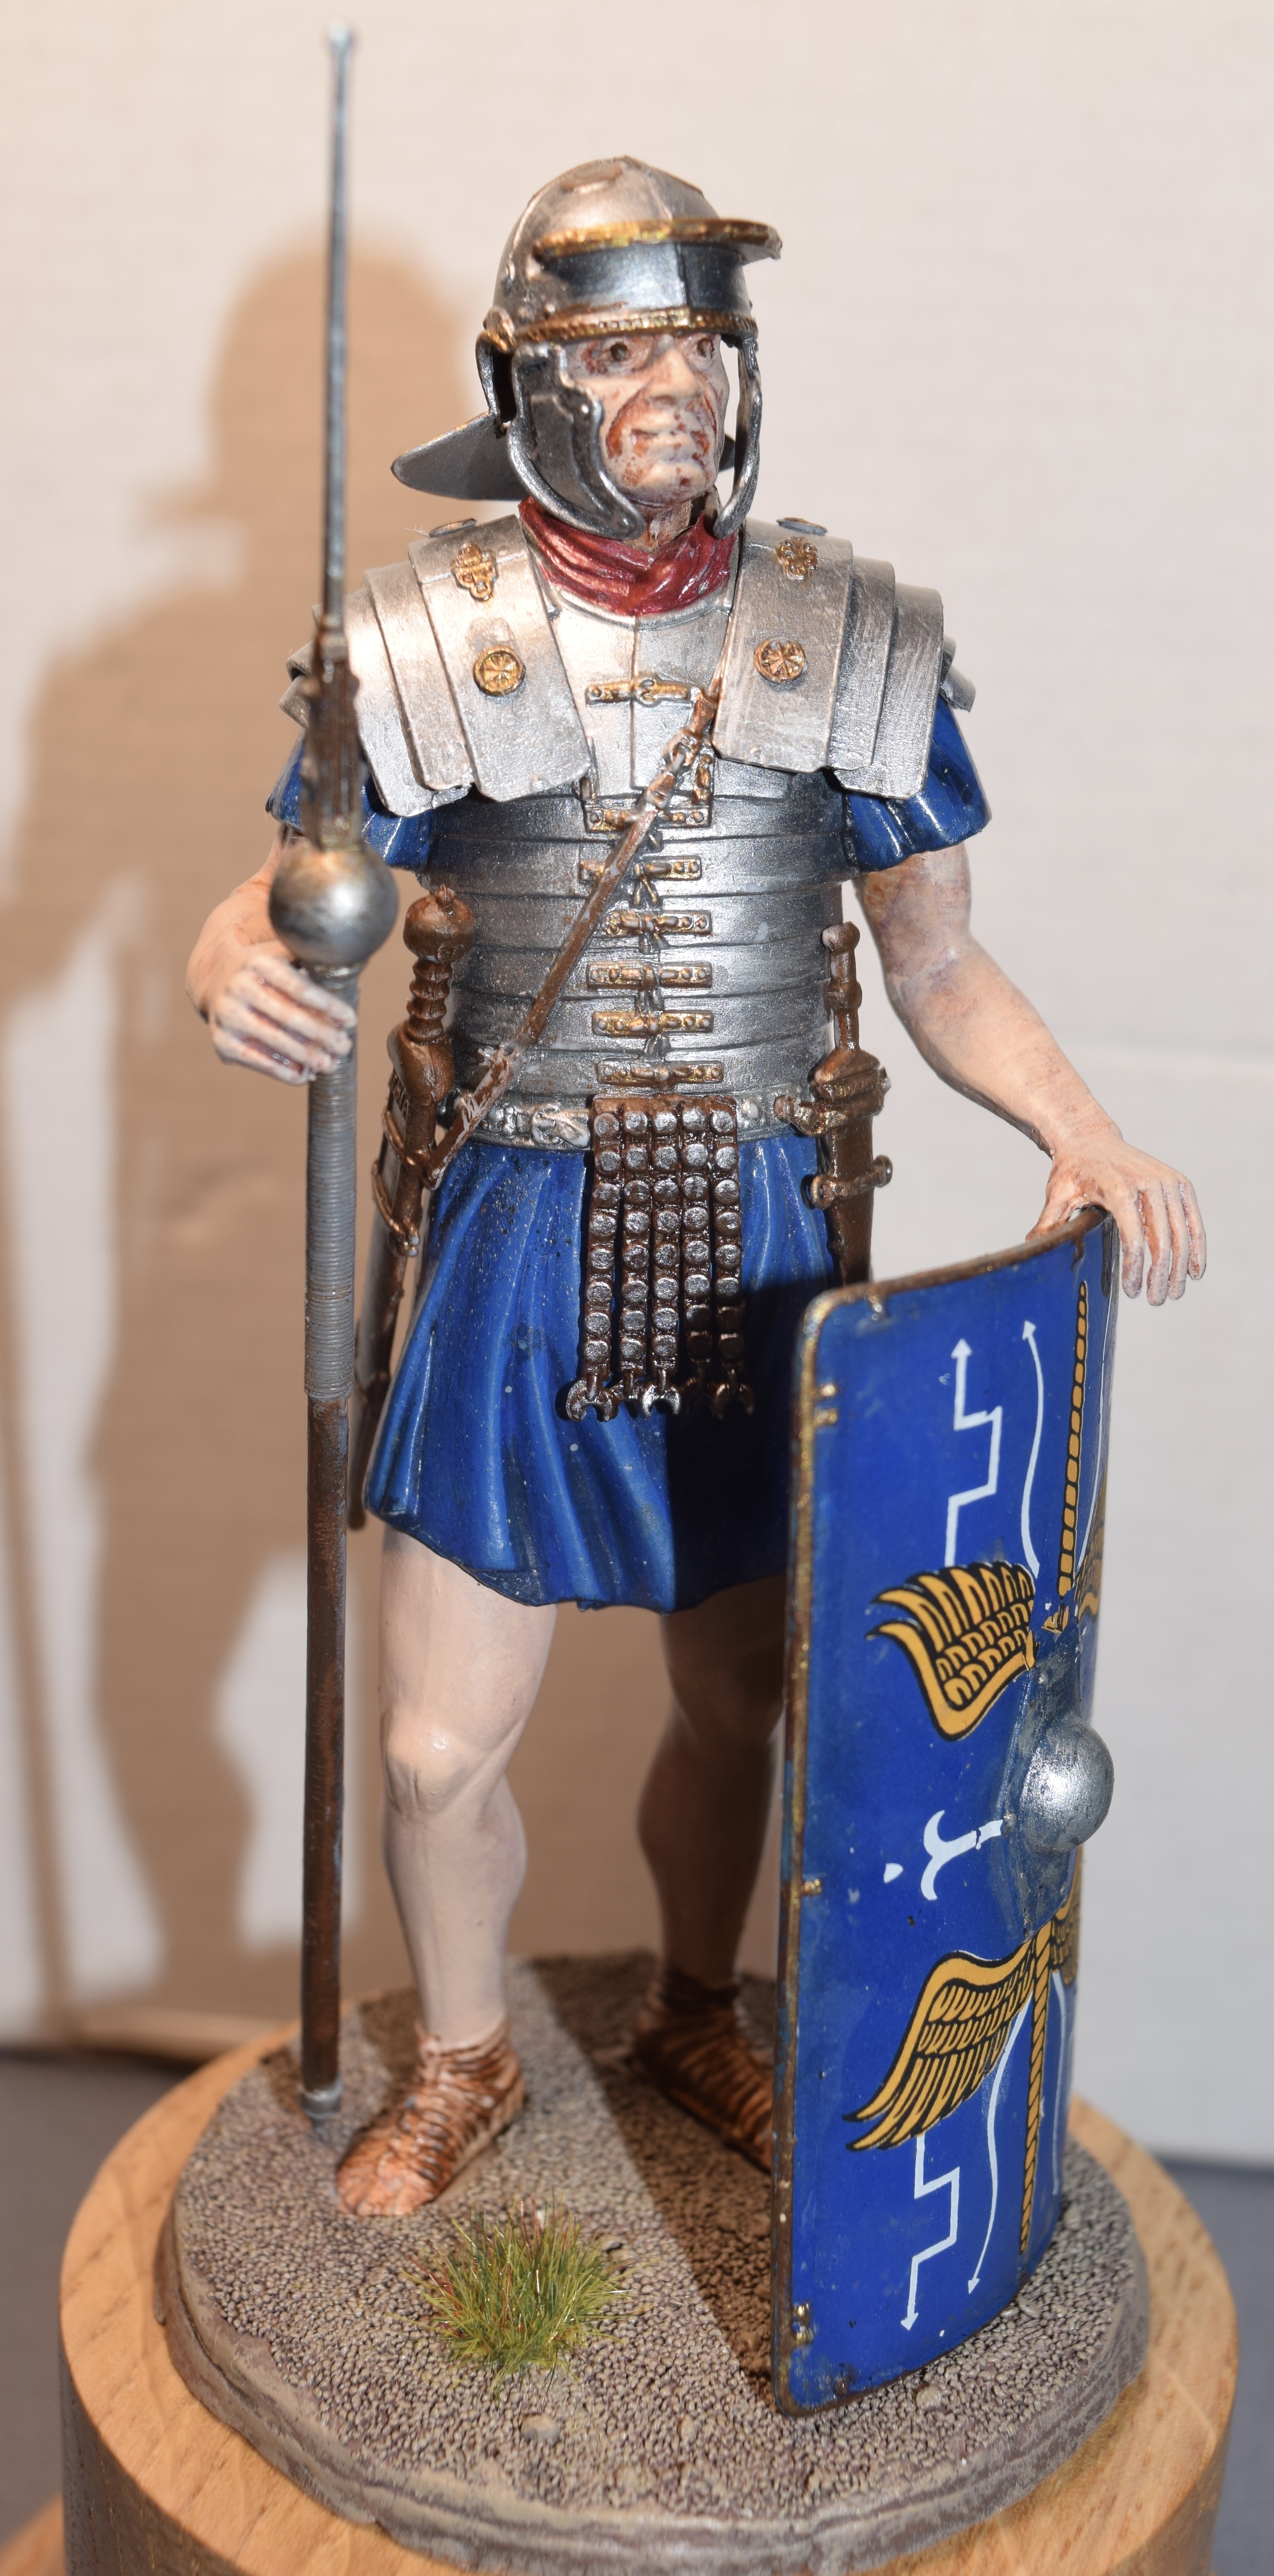
#miniartroman nearing completion still need to do decal to shield. a dry brush to his sword and dagger sheaths to highlight them and a touch of pigment to the base
#miniartroman So I dotted his eyes with a cocktail stick dipped in burnt umber. I have also picked out most of his buckles and fastenings, helmet rim and guard, first with Vallejo Metallic Tin and then Vallejo Metallic Gold using a brush. Still lots of small finishing touches to apply before the matt coat. I might try and make some laces for his helmet and a little more work to his neckerchief. Some touching up to the face where paint has chipped and some weathering to his arms and legs so they don’t look quite as feminine.